User Guide · 00
Quick Start: From Zero to Your First Facebook Group Post
Send your first Facebook group post with Prism Reach in one wizard: add an account, write the post (AI anti-duplicate), auto-pick groups, schedule and send. 15–20 minutes, with screenshots and a 7-minute video.
Updated 2026-09-139 min readFor app v1.7.3

By the end of this page: you will have sent your first Facebook group post from your own account.
Easiest starting point: a Facebook account you've used normally for a while that has already joined some groups. After you log in, the app syncs those groups in automatically — no searching, no waiting for approval, you can post straight away.
- Only have a freshly registered account? → Read Side path B at the end first.
- Your account hasn't joined many groups? → Finish the main path, then read Side path A.
How long it takes: 15–20 minutes, mostly waiting for the Facebook login and the group sync.
Step 1: Open the wizard from the Dashboard
Open the app. At the top right of the Dashboard there is a 「New posting campaign」 button. Click it the first time you use the app.
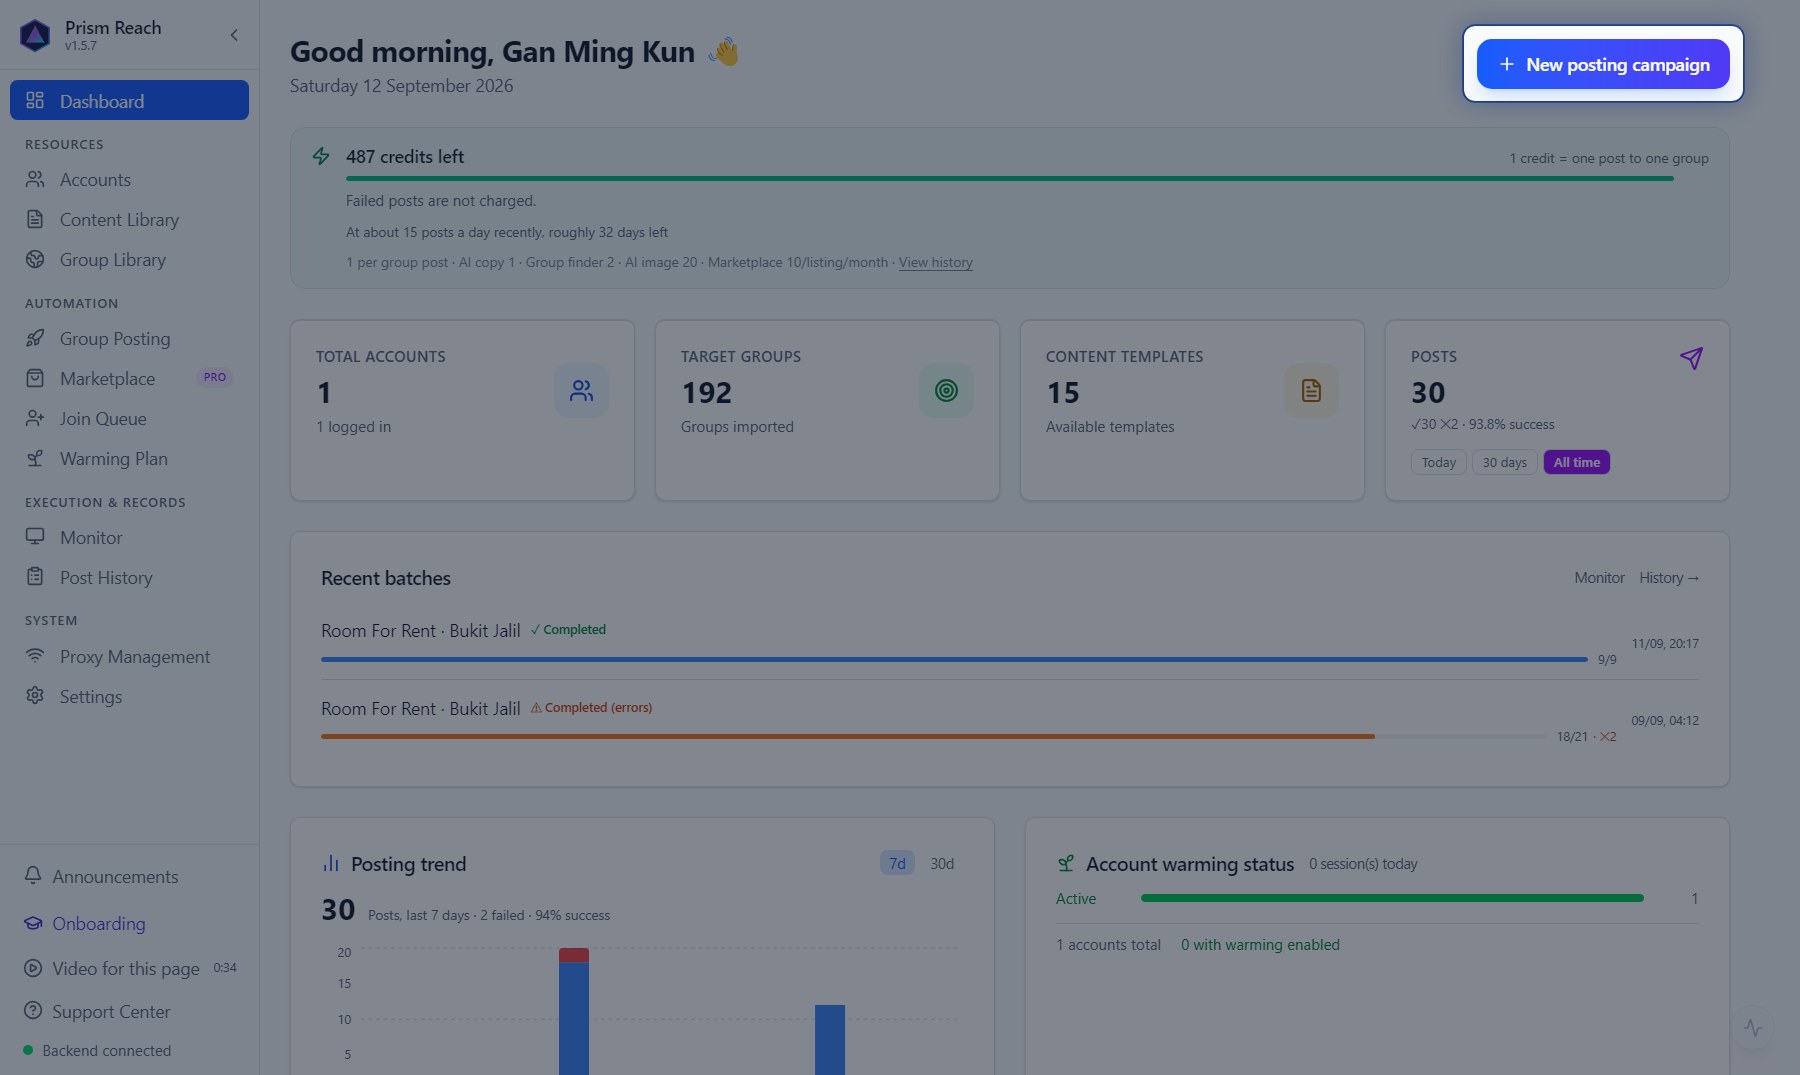
The wizard opens with four steps across the top: Accounts › Post items › Schedule › Preview & run. Steps 2 to 6 below are those four.
Step 2 · Wizard ①: Pick a Facebook account
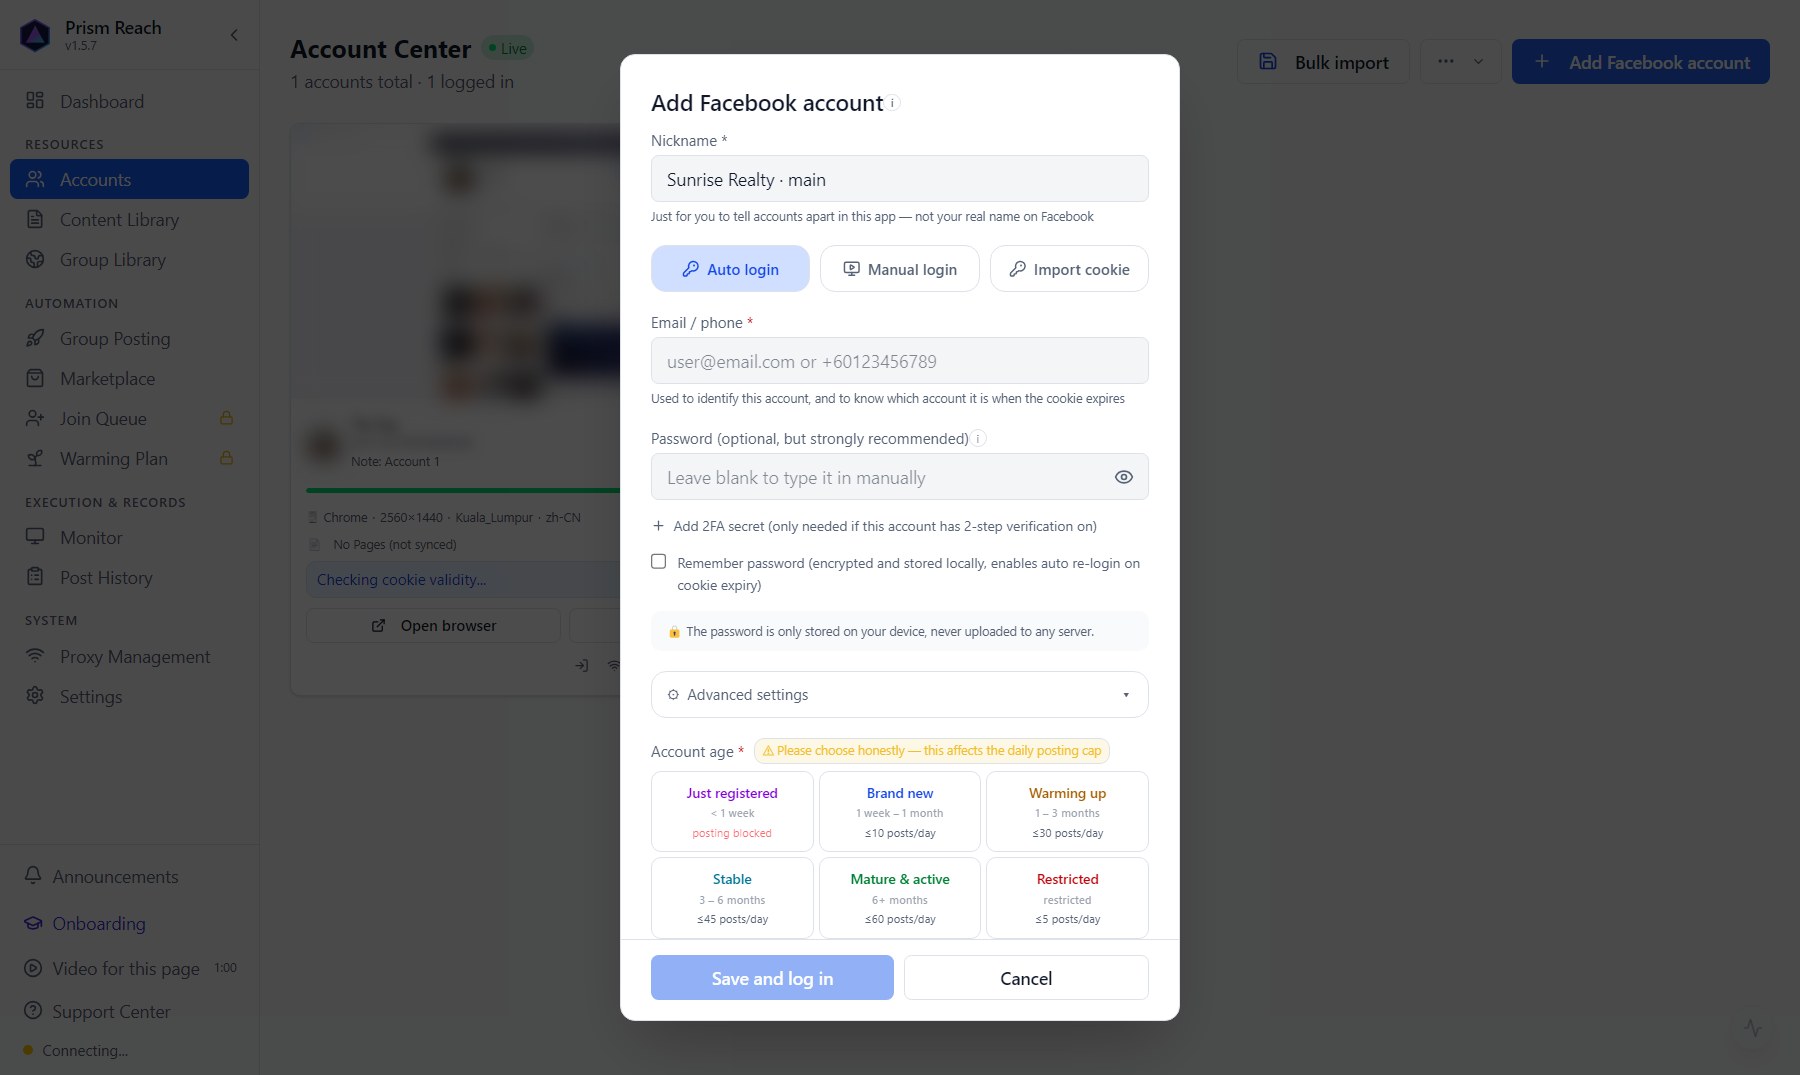
The first step lists every account that can post — tick one. No accounts yet? The wizard takes you to Accounts; click 「Add Facebook account」:
- Nickname: anything you'll recognize, e.g. "Main account". This is not your Facebook name.
- Pick a login method: 「Auto login」 — enter your email and password and the app fills them in for you; 「Manual login」 — you type them yourself in the browser window that opens; 「Import cookie」 — for an account that's already logged in on a normal browser. For your first time, choose Auto login.
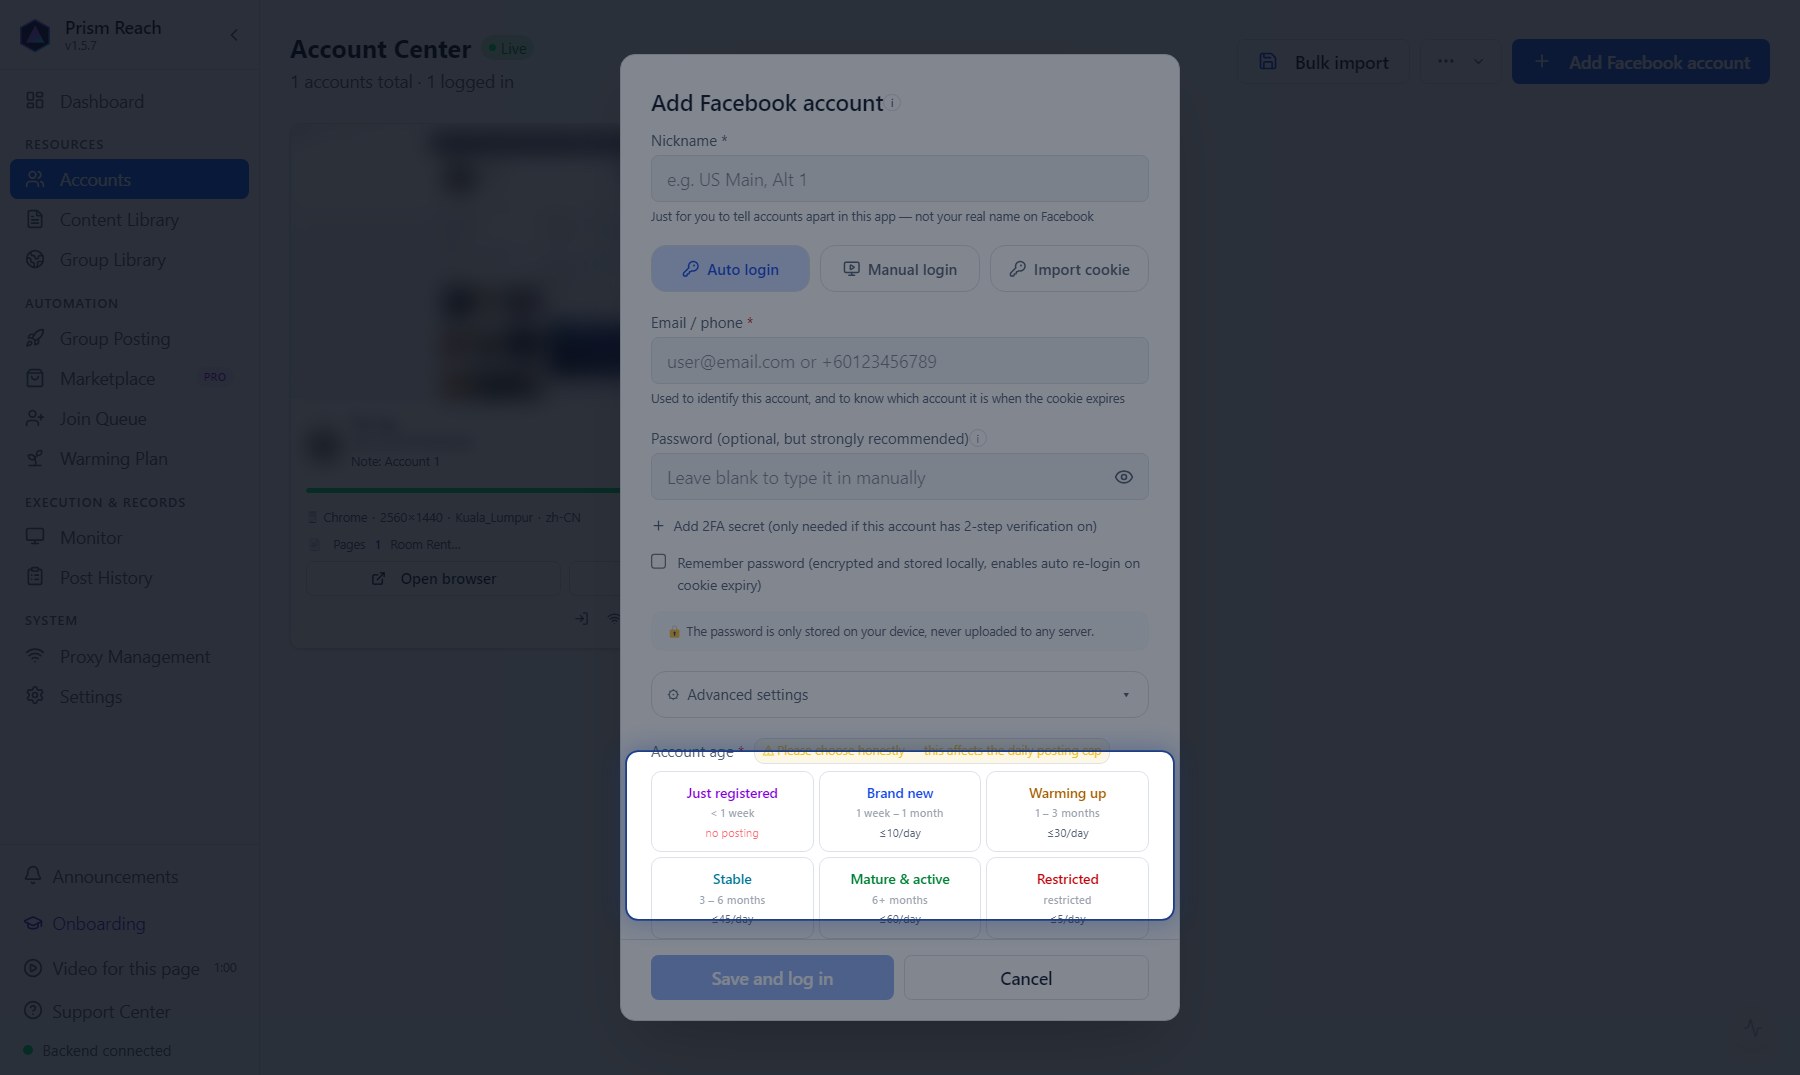
- Account age — you must choose one, or you can't save. It decides how many posts this account may send per day. An account you've used for years → 「Mature & active」 (6+ months). Do not pick 「Just registered」 by mistake — that tier posts nothing at all.
- Click 「Save and log in」. The app opens a browser window. If Facebook asks for a captcha or an SMS code, complete it in that window, and don't close it.
Once you're logged in, the app carries on with three jobs by itself. You don't have to wait — go back to the wizard and keep going:
- Sync groups: pulls every group this account has already joined into the Group Library.
- Check posting permission: opens each group to see where this account can really post. This is slow; groups not checked yet show as 「? Undetected」 — that doesn't mean you can't post there, only that it hasn't been checked yet.
- Detect areas and types: works out which area each group covers and whether it's for rooms or whole units — that's what the next step uses to tick the right groups for you.
Step 3 · Wizard ② (top half): Write what you're going to post
The second step is one "what to post → where to post it" pairing: posts on top, groups below.
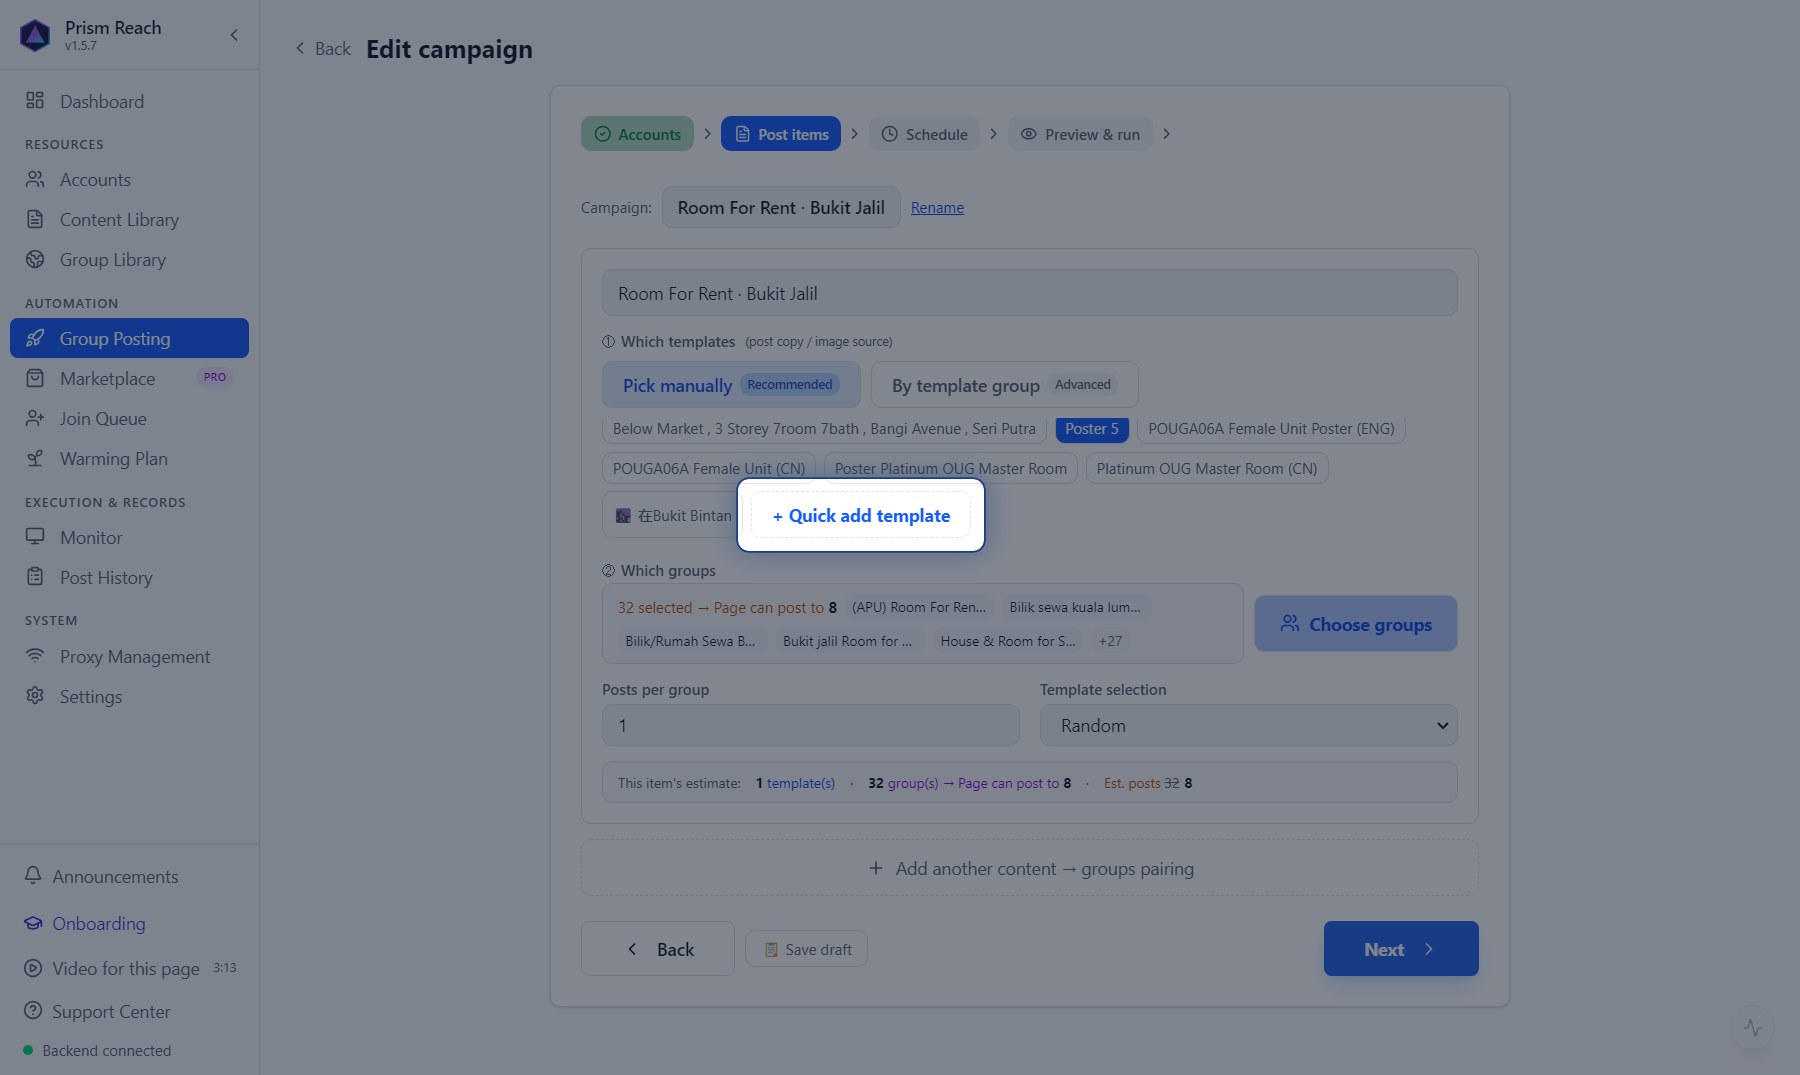
No posts yet? Click 「+ Quick add template」 and write one right here in the wizard — no trip to the Content Library:
- Add a photo (drag it in, or click to pick one).
- Write the text the way you normally post. No special format needed.
Then click the purple 「One-click anti-duplicate (AI adds Spin Text)」. Sending the identical text to dozens of groups looks like spam to Facebook; one click and the AI picks out the words that can vary and rewrites them as random alternatives — so every group gets a slightly different post. Don't like it? Undo, or edit a couple of words yourself.
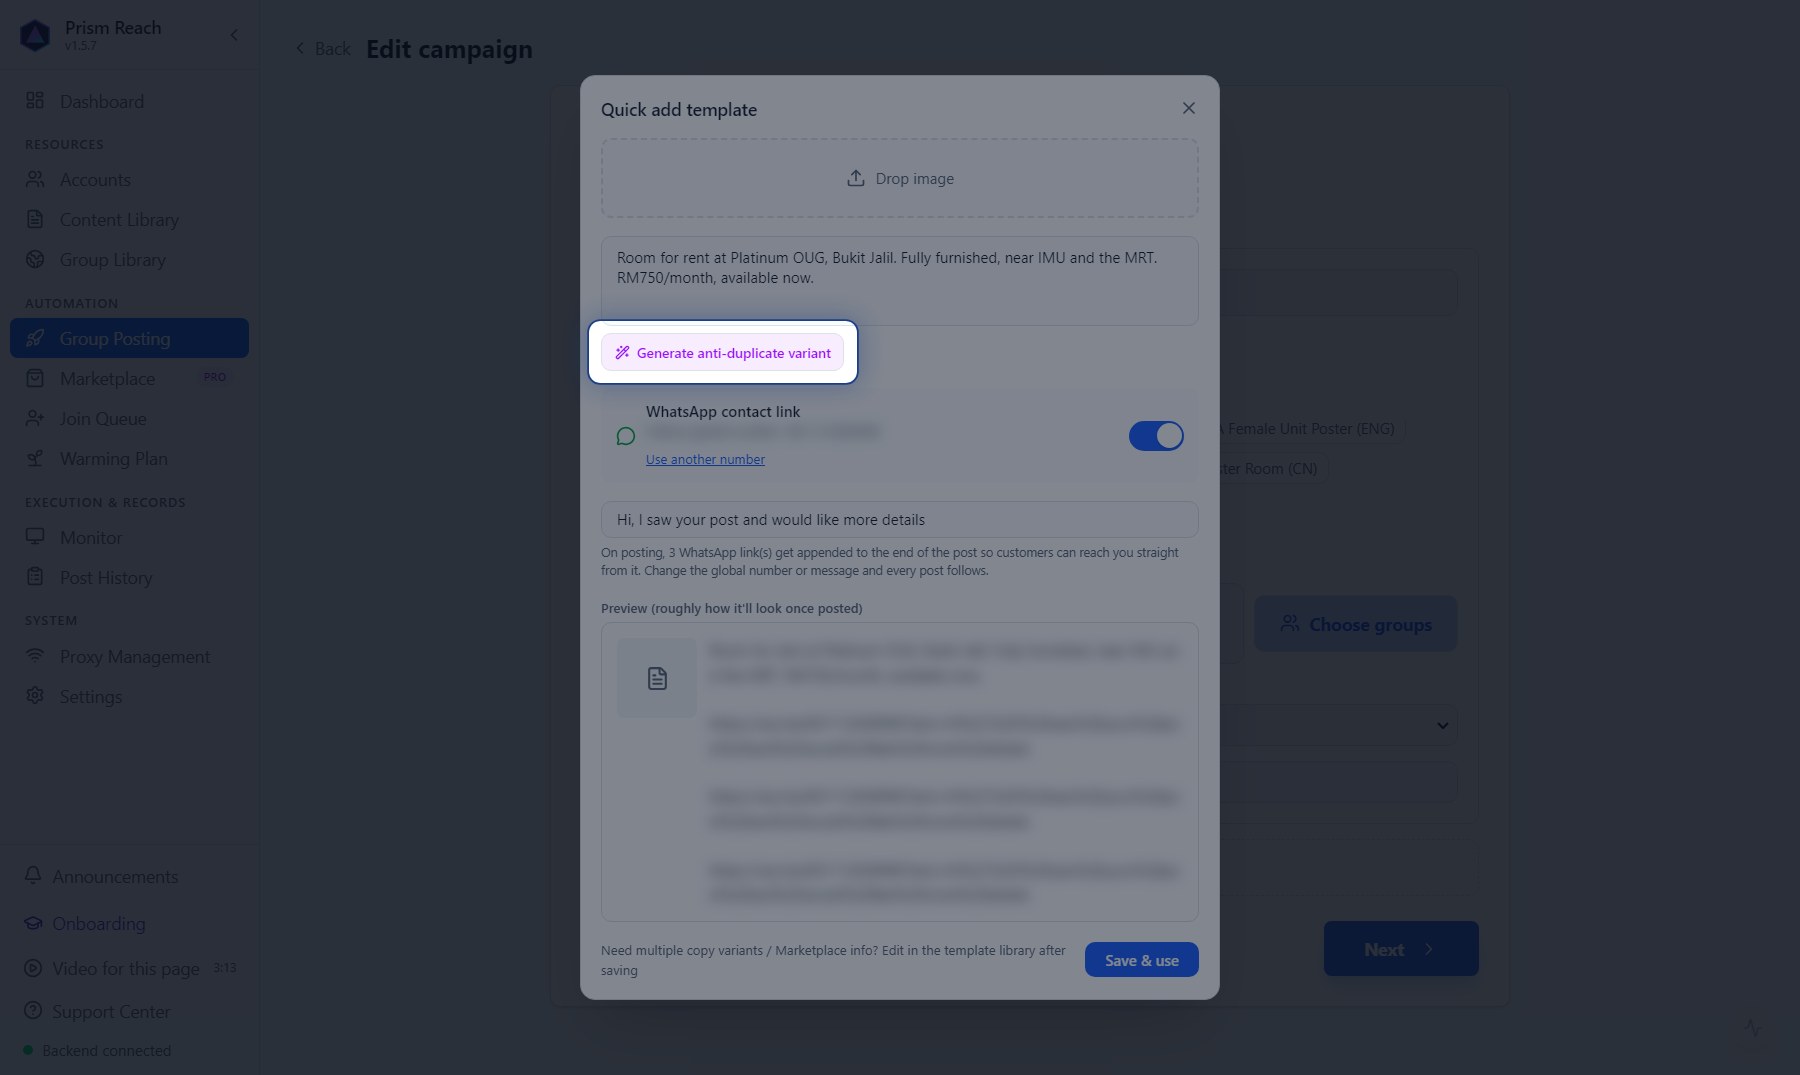
Below that is the WhatsApp contact link: when posting, 3 links are appended automatically at the end (one blank line apart, so there's always one wherever the reader stops). So don't paste one into the text yourself — a manual one isn't removed, you'd end up with 4, and a repeated link is a known spam signal on Facebook.
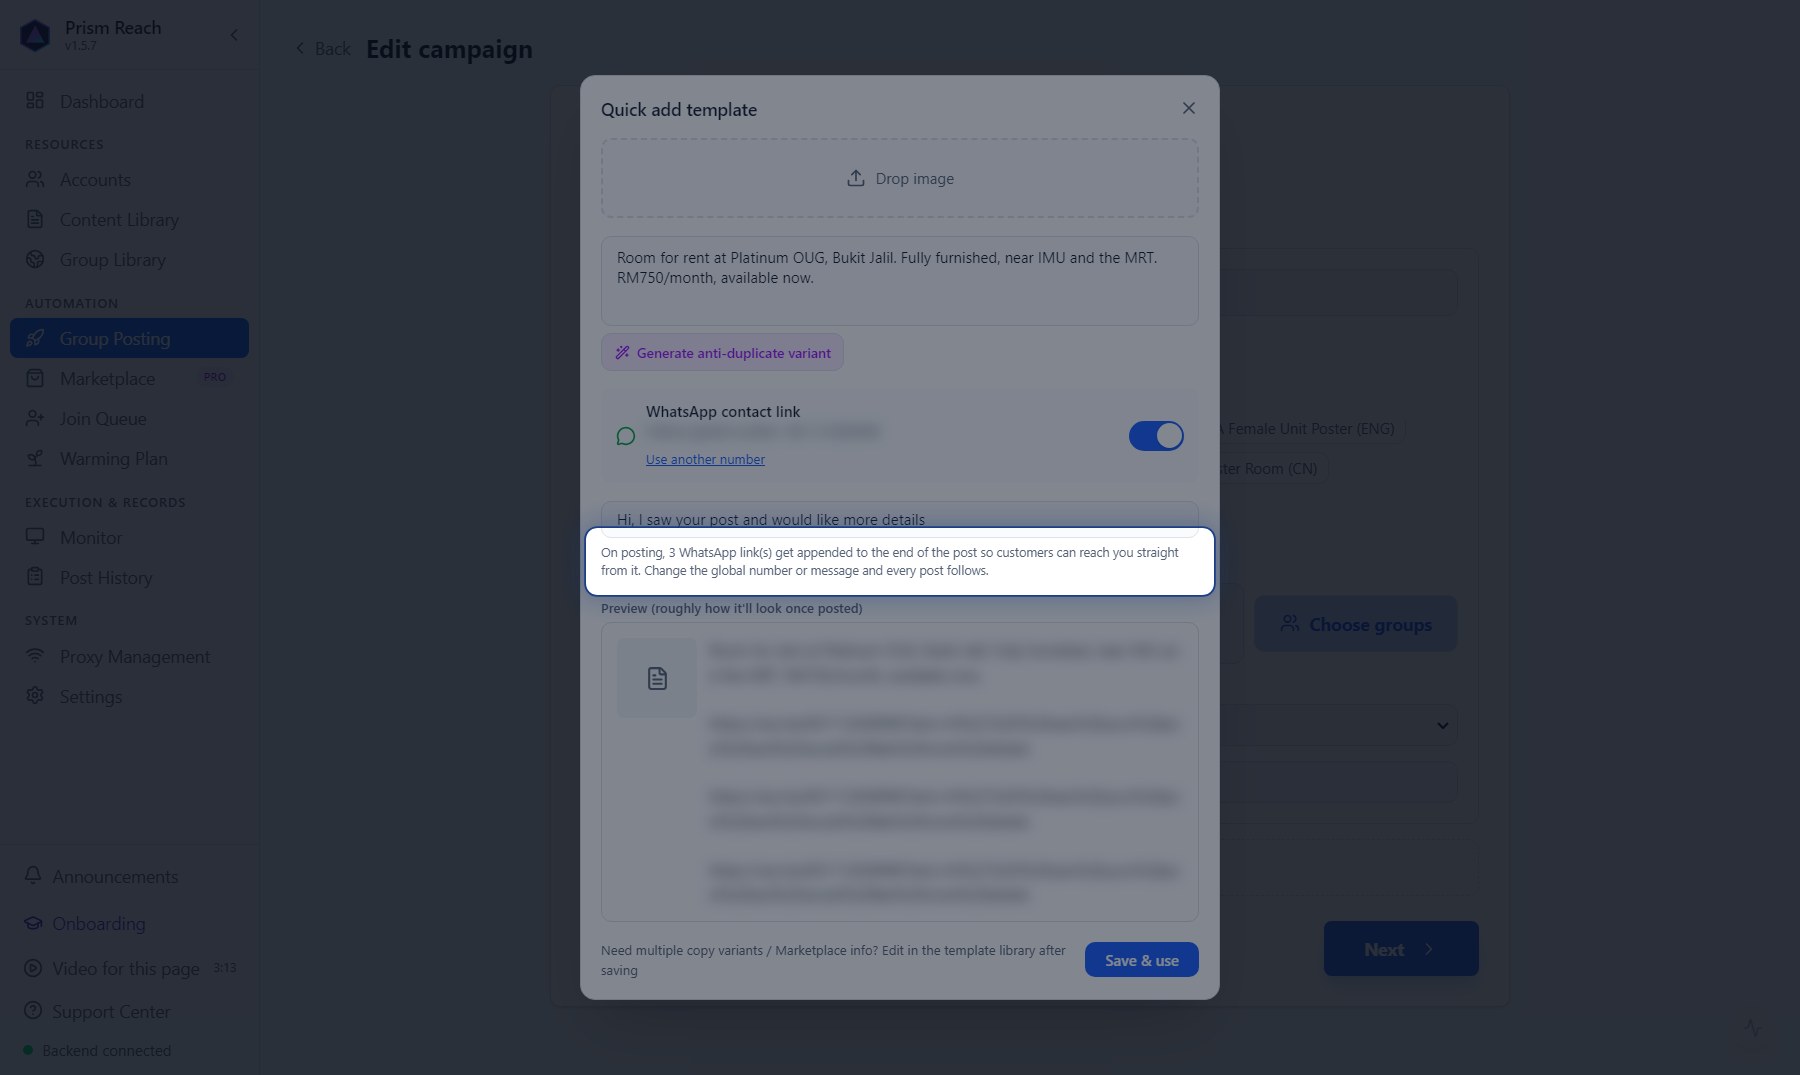
The Preview at the bottom is exactly what goes out. Looks right? Click 「Save & use」 — the post is saved to your Content Library and already selected here.
Step 4 · Wizard ② (bottom half): Pick the groups
In the same step, click 「Choose groups」.
The picker opens with the groups already ticked for you: it read the post you just wrote, worked out the area and the type (for example "Bukit Jalil · room rental"), and ticked every group that matches. The left column spells out how it split them:
- exact: groups sitting in the area named in your copy.
- wider: groups covering a bigger area that contains yours (a "Kuala Lumpur-wide" group also takes a Bukit Jalil listing).
- not selected: listed with the reason — wrong area, wrong type, or the group has no area tag at all.

- Got it wrong? Click 「Edit」 next to Area or Type and fix it.
- The type filter dropped a few groups you want? Click 「Ignore type」.
- Already organized your groups with your own tags? Switch to 「Use my own tags」 at the top and pick by your tags only.
- You can also tick or untick groups by hand — the ones you touched are remembered separately.
When it looks right, click 「Confirm」 at the bottom right.
Step 5 · Wizard ③: Choose when
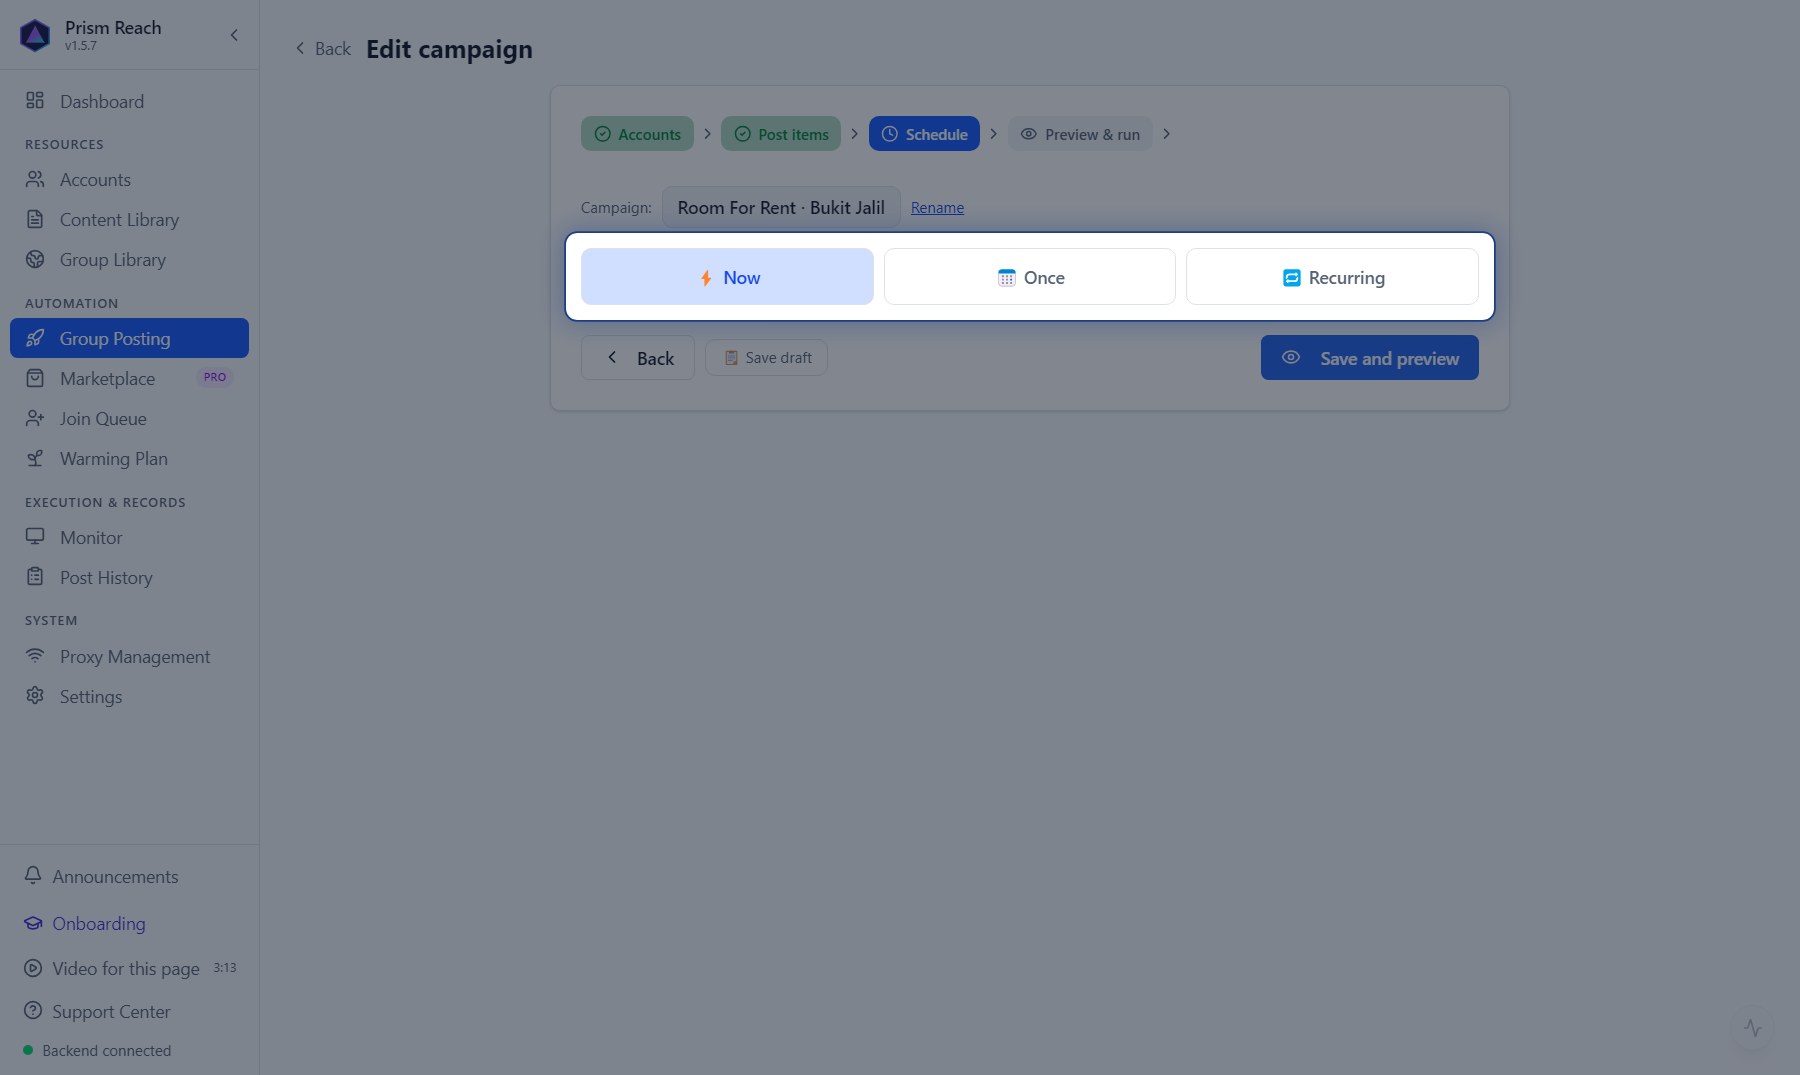
For your first time, choose 「⚡ Now」. Later you can use 「📅 Once」 (a set time) or 「🔁 Recurring」.
Step 6 · Wizard ④: Confirm and send
The last step lists everything that will be posted: 「Will post from N account(s) to M group(s)」, followed by how many groups are skipped this run.
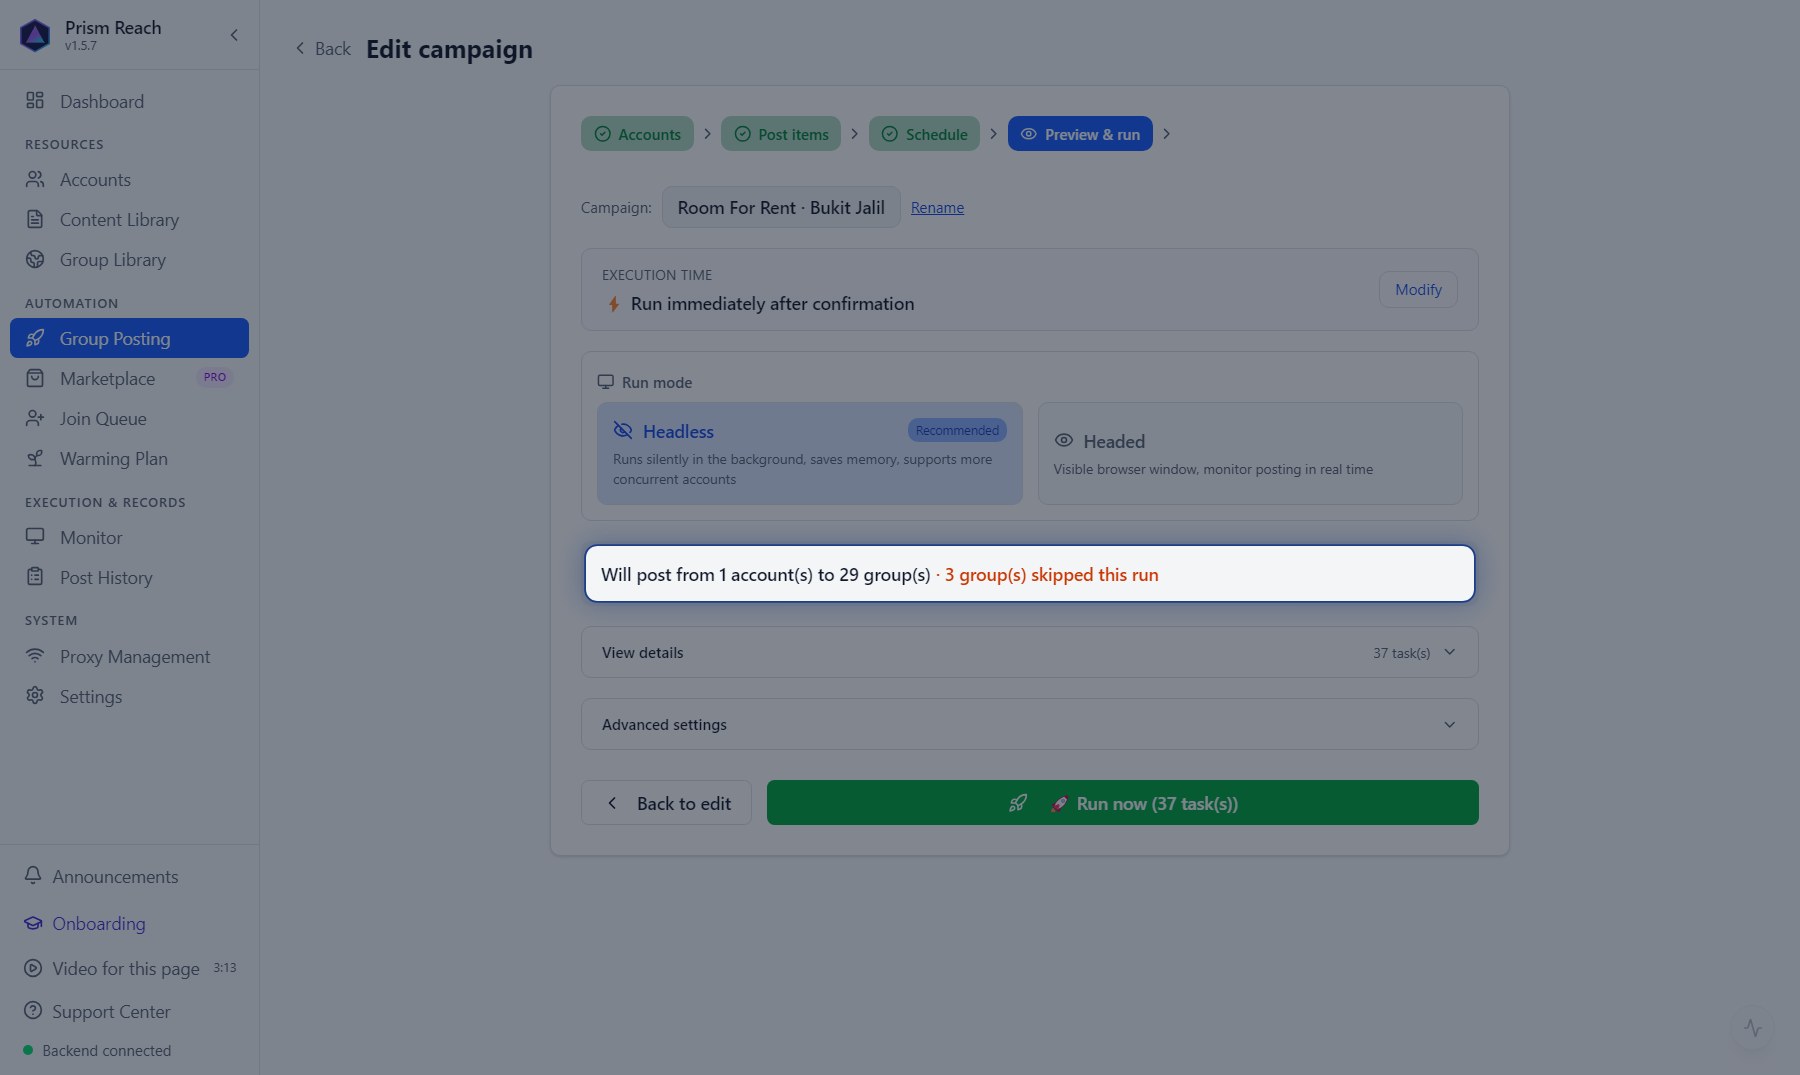
- Run mode: 「Headless」 runs silently in the background (recommended); 「Headed」 shows visible browser windows. The very first time you post, a window opens either way so you can watch.
- Skipped groups come with the reason (buy & sell group, admin turned posting off, permission not checked yet…). For groups whose permission hasn't been checked, the app has already turned on "try them anyway" — no switch to hunt for. Failures are explained and don't affect the other groups.
If everything looks right, click 「Run now」.
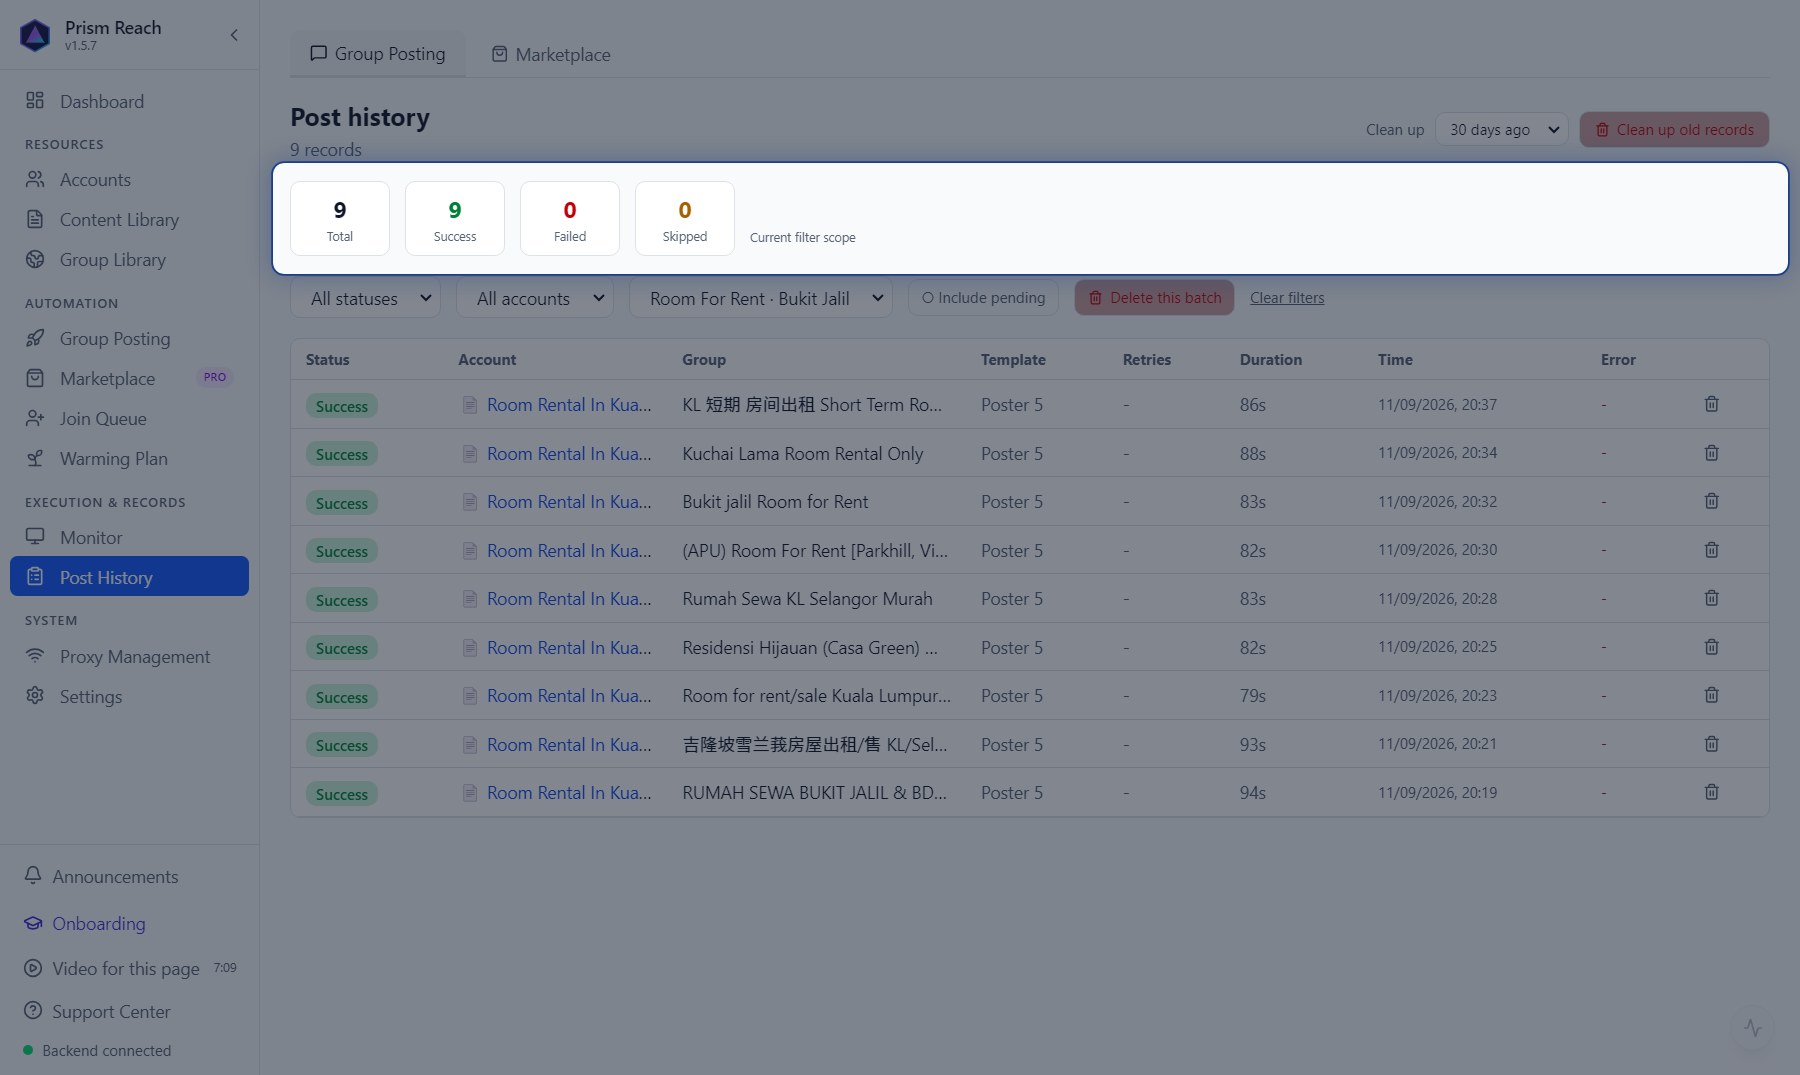
Step 7: It posts by itself — where to watch
- Monitor: watch it while it's posting — which account, which group, how far along.
- When a batch finishes, a summary pops up: how many were posted, failed, skipped.
- Post History: every post — which group, what time, whether it worked — is recorded.
🎉 That's it — you've gone from 0 to 1.
Next time, no need to set it up again
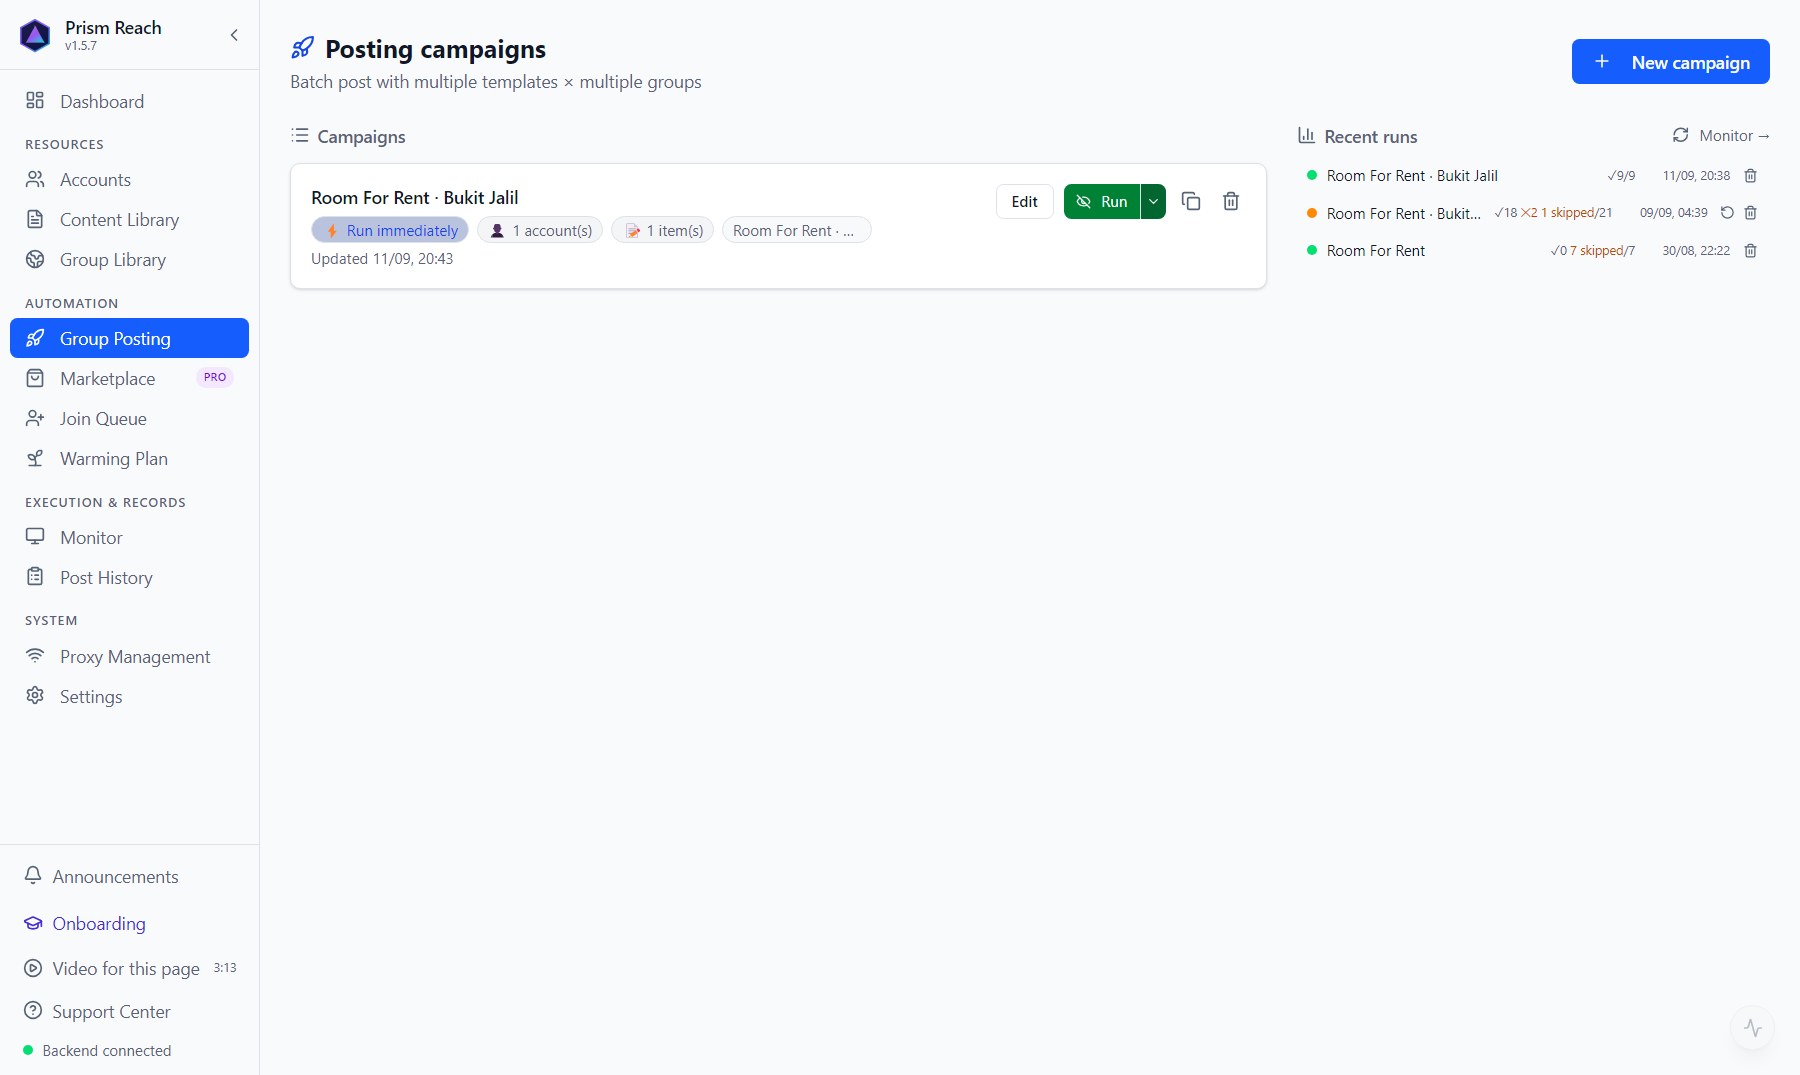
Your campaign stays in the campaign list under Group Posting. To post again, come back here and click that campaign's 「Run」. To post a new listing, click 「Edit」, swap the post, and run it.
Side path A: too few groups synced, or not the right groups
You need to find groups, then join them:
- Find groups: Group Library → 「Find more groups」 (top right). Type keywords (e.g. room for rent); the AI searches Facebook for groups, scores them, and you import the good ones. Or use 「Add Group」 to paste a group link yourself.
- Join: ⚠️ adding a group to your library ≠ your account being a member. Select the groups in the Group Library and click 「Join Queue」 — the app will request to join slowly, at a human pace, during the day.
The free plan can find groups too, and gets 50 auto-join requests for life; Starter and above join without a count limit. More detail: 03 · Group Library and 04 · Join Queue.
Side path B: you only have a brand-new account
The 「Just registered」 (< 1 week) tier cannot post at all — that's a protection against bans, not a bug. A new account that starts posting immediately almost always gets restricted by Facebook. After 7 days it moves up to 「Brand new」 automatically (up to 10 posts a day).
- Meanwhile you can turn on the Warm-up Plan so the account scrolls, likes and builds up some "real person" history.
- Faster: use a normal, aged account to get through the main path, and let the new account warm up on the side.
What to read next
- Post more without repeating yourself, write copy with AI → 02 · Creating & Managing Content
- Reach more groups → 03 · Group Library + 04 · Join Queue
- Post as a Facebook Page, set up several posts → 01 · Account Management & Login + 06 · Configuring Posting Campaigns
- List on Marketplace → 07 · Marketplace Publishing
- Strange errors, worried about bans → 10 · FAQ & Risk Notes
Don't have Prism Reach yet?
The free plan needs no credit card — install it and follow this guide.